Stuck for ideas on how to entertain the kids this half-term? Don’t worry, we’ve got you covered with crafts!
Keeping youngsters occupied is a struggle – even without the added obstacle of a national lockdown. If you’re looking for inspiration on how to fill your days this February half-term, look no further. Like we did in October, we’ve brought to you a list of simple ideas to get the creative juices flowing.
We’ve factored in the fact you can’t nip out for crafts and games. So here’s to making use of bits and bobs you’ll likely have dotted around the house. It’s time for the children to get crafty – and hopefully will leave you with a couple of hours to yourself!
Lyons Craft Corner
1. DIY Flight School

Swap the home-schooling for flight school with this super-easy household hack! Once the planes and targets have been made, start a competition on who can get the most points.
You will need:
- Scissors
- Cardboard
- Paper
- Pencils/ paint/ crayons
- Cups varying in size (or similar round objects)
How to:
- Start by making a paper plane (or seven!) using an A4 or A5 sheet of paper. You can find extensive tips on how to do this here.
- Decorate the plane in your favourite colours and patterns (be careful not to glue or stick anything on as this could weigh the paper down and cause havoc with the aerodynamics)
- Place a cup flat on the surface of a stronger piece of cardboard. Draw around the rim to create a circle, and do the same with three different sized glasses
- Carefully cut out the circles – these will be hoops to shoot your planes through
- As is seen in the picture, decorate this ‘target’ with anything you like. Add numbers above each hoop, getting higher as the hoops go smaller
- Once you’re done designing and creating, have a go at flying the planes through the hoops. Don’t forget to keep score!
2. DIY Thumbprint Family Tree
Get an afternoon of craft AND a history lesson out of this one! Spend time with your little ones telling them about your family, with some visual aids too.

You will need:
- Nice paper or card
- Green and brown paint
- Paintbrushes
- Opposable thumbs!
- Pen or pencil
How to:
- Pour some green paint onto a paper plate – the more shades of green, the better
- Start by painting a simple tree trunk in the centre of the page
- Add some branches as you go, making sure there’s one branch per couple/ family
- Add more branches and twigs onto the smaller branches to represent the children
- When you’re done with the trunk, get the kids to dip their thumbs into the paint on the plate
- Dab around the branches to create leaves
- Once it’s dried, fill in the branches with your family’s names
- Feel free to share some memories or personal anecdotes with the kids as you go!
3. DIY Craft Foam Paint
This one combines art and science into a fun little project that you never knew you never knew. Get the aprons out as it can prove messy…but worth the overnight anticipation.
You will need:

- Card
- Shaving foam
- Kid’s craft glue
- Food colouring (or ink, or strong & concentrated paint)
- Sandwich bag
- Scissors
How to:
- Start by mixing equal parts shaving cream and squeezy glue into a large food/ sandwich bag
- Add a couple of dashes of your desired food colouring, and squish the bag with your hands until it’s all mixed in
- Repeat this with a few colours to create a nice palette for your young artist
- When they’re ready to go, simply cut the corner off the sandwich bag
- Paint a pretty picture using the food bag on the card like you’d ice a cake
- Put it to one side when the kids are done, and leave it dry overnight
- The next day you’ll have your very own made-at-home colourful (and solid!) foamy picture
4. DIY Rainbow Rice

Sensory play just got a whole lot more colourful with this fun project. Make it once and watch the younger ones play with it time and time again. You can even introduce toy animals, plastic kitchen utensils – anything the kids would normally use in a sandpit.
You will need:
- White Rice
- Acrylic paint
- Sandwich bags
- Baking paper
- Baking tray
- Jars/ pots/ containers to store the rice
How to:
- Super simple: pour 2 cups of white, uncooked rice into a sandwich bag
- Add a blob of coloured acrylic paint (or one drop of food colouring if you’re concerned the rice will end up in tiny mouths)
- Mix with a spoon until the rice is completely covered. Use one blob at first and try it before adding more – too much paint can lead to stickiness
- When the rice is all covered, sprinkle it out onto a lined baking tray to dry
- Allow the rice to dry for 2-3 hours, giving it a wiggle to make sure the rice isn’t sticking
- Repeat with as many colours as you like
- Store in containers or bags and then hand over the rice reins to the little ones!
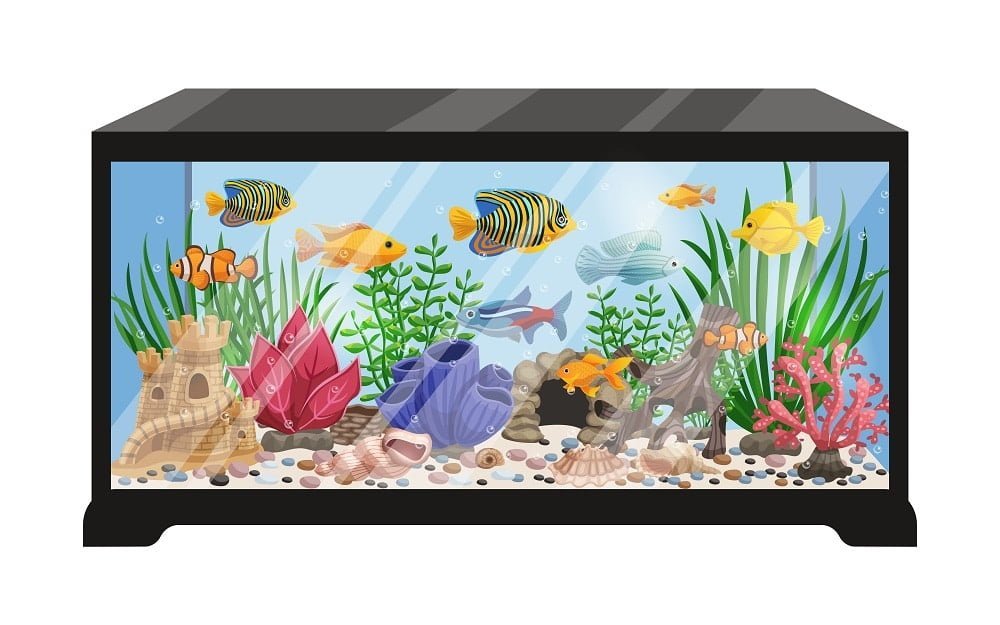
5. DIY Cereal Box Aquarium
Build your own aquarium and name all the fish. Perfect for making another world come alive – and a way to make use of your spare recycling!
You will need:
- Large cereal box
- Scissors
- Paints/ pencils/ crayons
- Anything shiny
- String or wool
- Stones, pebbles, shells…or even sand if you can get your hands on it!
How to:

- Lay the cereal box flat and draw a square outline with a ruler of 2cm in from the side – so it looks like a TV
- Ask an adult to carefully cut this out, so one side of the box is now removed
- Paint the box a dark colour so it looks like the outline of the tank in the picture
- Then paint the inside the box a light blue colour so it looks like water
- Once your aquarium has been set up, it’s time to start adding colour! You can paint some seaweed or coral on the back, and begin adding your animals
- Draw a picture of your favourite fish on a piece of card, then cut it out. Paint it on both sides and add some eyes and fins
- Get creative with anything shiny you can find like glitter, sequins, or even tin foil!
- Fill the bottom of the ‘tank’ with pebbles or stones, even shells if you have some.
- When you’ve made enough fish or starfish, cut a piece of string for each creature, that’s short enough to fit inside your box
- Sellotape one end of the string to the back of your fish. Sellotape the other to the roof of your box and let the fish swim free!
Lyons’ Favourite Grub for Cubs
Fancy making something that you can actually eat? Here’s a list of our favourite (and cutest!) February half-term snacks – easy to make with the kids, and yummy too.
1. Hedgehog Rolls
Making bread has never been cuter with these mini doughy animals. Your child’s first bread-making lesson doesn’t have to be boring – try creating these adorable little buns, and have fun decorating their spikes and little eyes.
You will need:
- 500g pack brown bread mix
- 25g butter
- plain flour, for dusting
- 12 raisins
- 6 flaked almonds (optional)
You can find the recipe here.
2. Rainbow Donuts

These colourful cakes are fun to make – and even more fun to eat! Adult supervision may be needed to make the dough. But we think pouring the melted chocolate and sprinkles over is a task fit for a little chef!
You will need:
- 300g chocolate
- 25g butter
- 2 tbsp golden syrup
- 2 tbsp milk
- 80g rice crispies cereal
- sprinkles
3. Happy Face Pizza

Every kid loves pizza, right?! Well, if they don’t, this fun cooking class which ends with a lip-smacking result will get them feeling all cheesy and Italian in no time. You can make your own dough if you’ve got plenty of time to kill. But, if you think kneading flour and water will lead to an explosion in your kitchen, feel free to buy ready-to-roll pastry for the base.
You will need:
- Flour
- Yeast
- Salt
- Olive oil
- Chopped tomatoes
- Garlic
- Any toppings of your choice
- Lots of cheese!
Here’s one suggestion for a fun recipe to try with the kids. For something quicker, simpler but equally as delicious, try this pitta pizza recipe.
4. Choccy Nutty Flapjacks

We’re keen to get some healthier snacks in here, and this gooey nutty flapjack is a great homemade source of protein. It’s simple to make, requires general household ingredients, and can be kept for quite a few days.
You can swap the pecans for anything – walnuts, cashew nuts, pine nuts. Adding raisins or dried cranberries is also a good way of sneaking some fruit into the diet.
You will need:
- 200g unsalted butter
- 200g golden syrup
- 140g light soft brown sugar
- 450g rolled oats
- 80g pecans, roughly chopped
- 150g chocolate chips
Here’s the best flapjack recipe we found that incorporates chocolate with nuts!
5. East Pancakes In The World

Is 2021 going quick to you? We think it is…because its pancake day next week!!! We decided to finish this list with a half-term-must – although exuberant flipping is optional.
Do you already have a favourite pancake recipe? Perhaps a family favourite or a fluffy one you’ve mastered over the years? Well here’s a recipe for the easiest pancakes ever, perfect to make with smaller children.
You will need:
- Plain flour
- Eggs
- Milk
- Butter
Can you recommend any DIY craft projects for other parents over half-term? Comment below to share your ideas!


